
About two years ago, I studied for the CWISA exam from CWNP and learned about LoRaWAN for the first time. With many HomeKit devices, I have been interested in IoT for a long time. But with the CWISA, I got deeper into IoT technologies.
When I got informed that my planned WLAN security boot camp at WLPC EU 2023 didn’t get enough reservations, I booked the LoRaWAN boot camp from Raymond Hendrix and Troy Martin. This was a great learning experience, and we spent three days learning a lot about LoRaWAN and building a little LoRaWAN setup with a gateway, a power plug, a smart button, and an IoT server based on node-red, influx, and Grafana.
This blog post is meant to summarise how I extended this Lab to learn, get more practice with LoRaWAN, and build something useful simultaneously. As with most labs, it is certainly not all “best practice,” but it could give some ideas if someone is interested in building a LoRaWAN lab.
The Lab devices
From the WLPC boot camp I already had the following components:
- Raspberry Pi 4B
- RAK5146 Gateway Concentrator Module for LoRaWAN
- Milesight WS523 Portable Socket
- A Smart Button that is not yet used in this setup
My problem statement
I have a refrigerator in the cellar where I cannot connect a WLAN-based smart plug. This diagram shows the distance from my home to the basement.
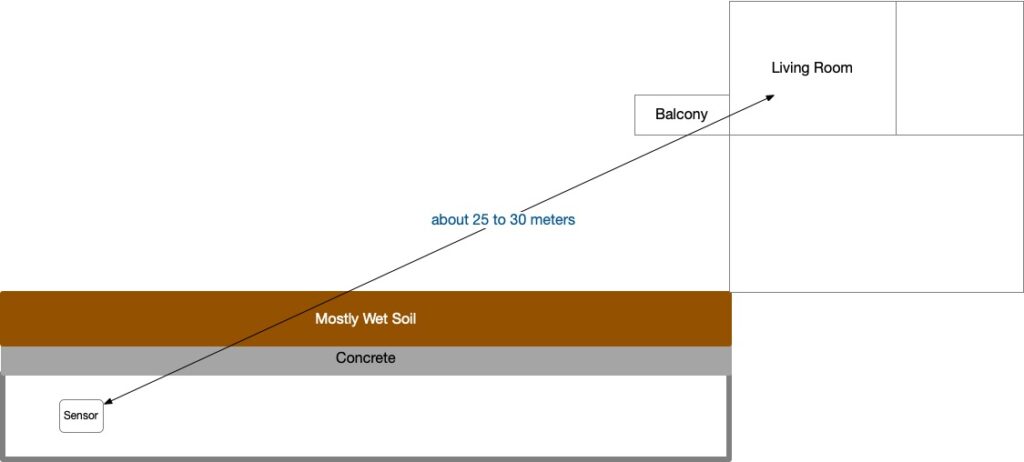
Most problematic are the circa 80cm of concrete and soil (often wet in Germany).
In the past, we had to throw away food because of a power outage that we overlooked.
I hoped that I could connect the Milesight WS523 power plug from the boot camp with LoRa.
First test: I placed the Raspberry Pi-based gateway with the RAK5146 module in my living room and waited for messages from the power plug. Nothing!
Second test: I increased the spreading factor up to 12 without success.
Third test: I placed the gateway on the balcony table and got messages from the sensor. But by moving the sensor to a rain-protected place, the messages again ceased.
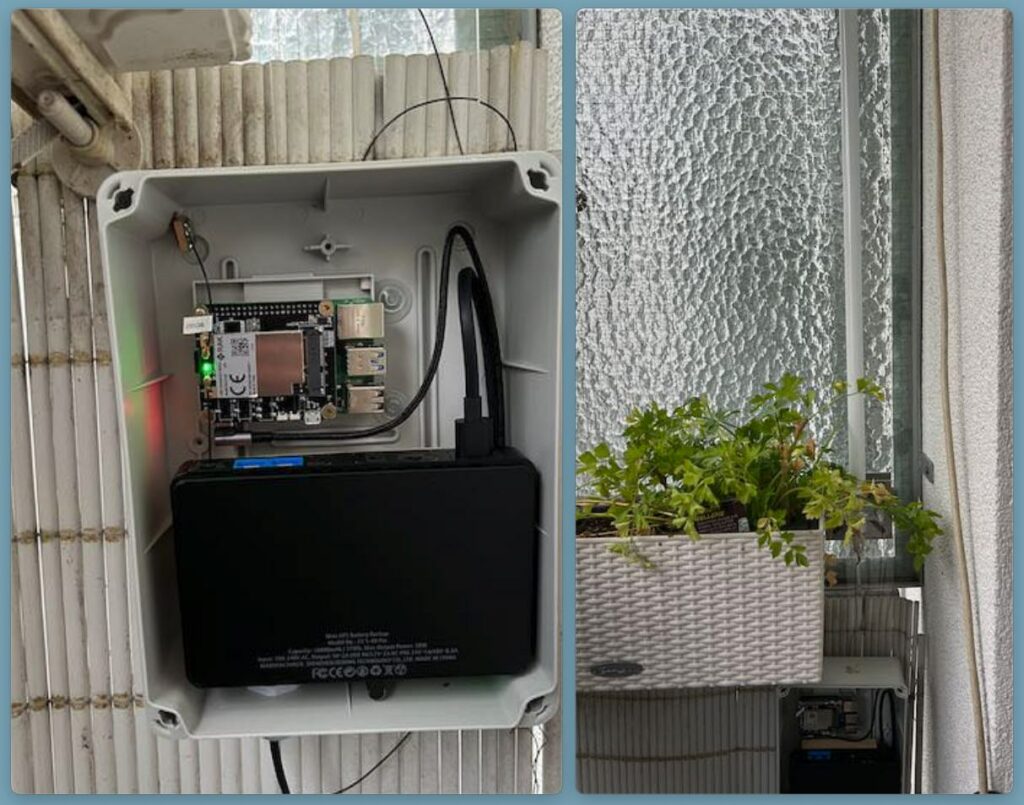
With these results, I decided to get an external antenna and an outdoor enclosure.
I decided to use the RAK 5.8 dBi antenna:
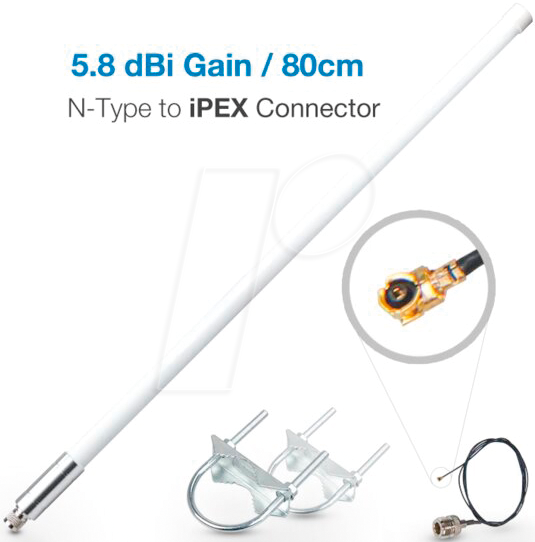
For the Raspberry Pi gateway, the iPEX connector is needed.
Link: https://store.rakwireless.com/products/5-8dbi-fiber-glass-antenna
The enclosure is made of plastic and is IP65 rated:
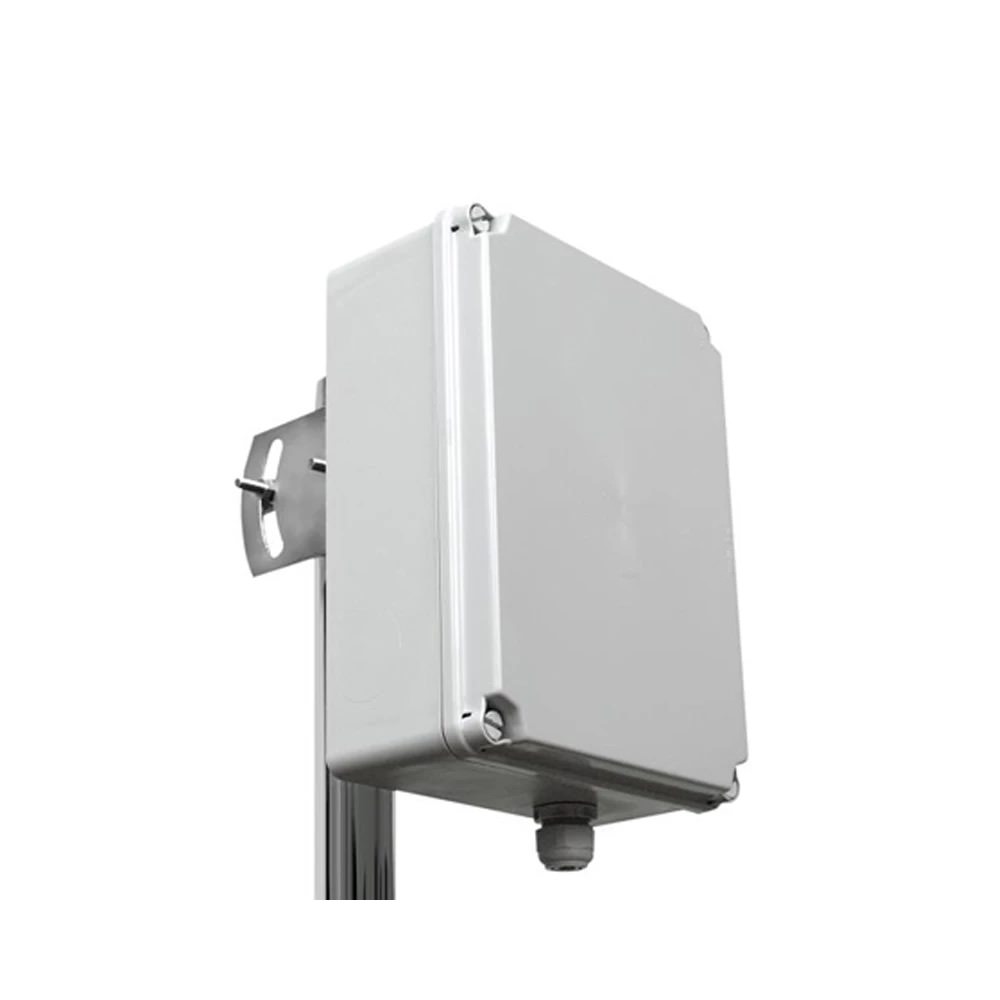
Link: https://www.wlan-shop24.de/plastic-enclosure-cabinet-mast-installation
When the enclosure was delivered, I thought about how I could ideally power my gateway. I have a power outlet on the balcony, but it has a switch in the living room. And I don’t want a failed gateway because I accidentally pressed the power switch.
So, I added a mini UPS to the setup. This is the same low-cost UPS that I use to power APs for short surveys. Not shown in this picture, but on the back is also a USB connector.

Link: https://www.amazon.de/gp/product/B0921SB3LJ
When assembling everything, I realized a standard USB-C cable didn’t fit, but a cable with 90-degree rotated connectors worked fine. This is 50cm long, the shortest cable I found with 90-degree connectors.
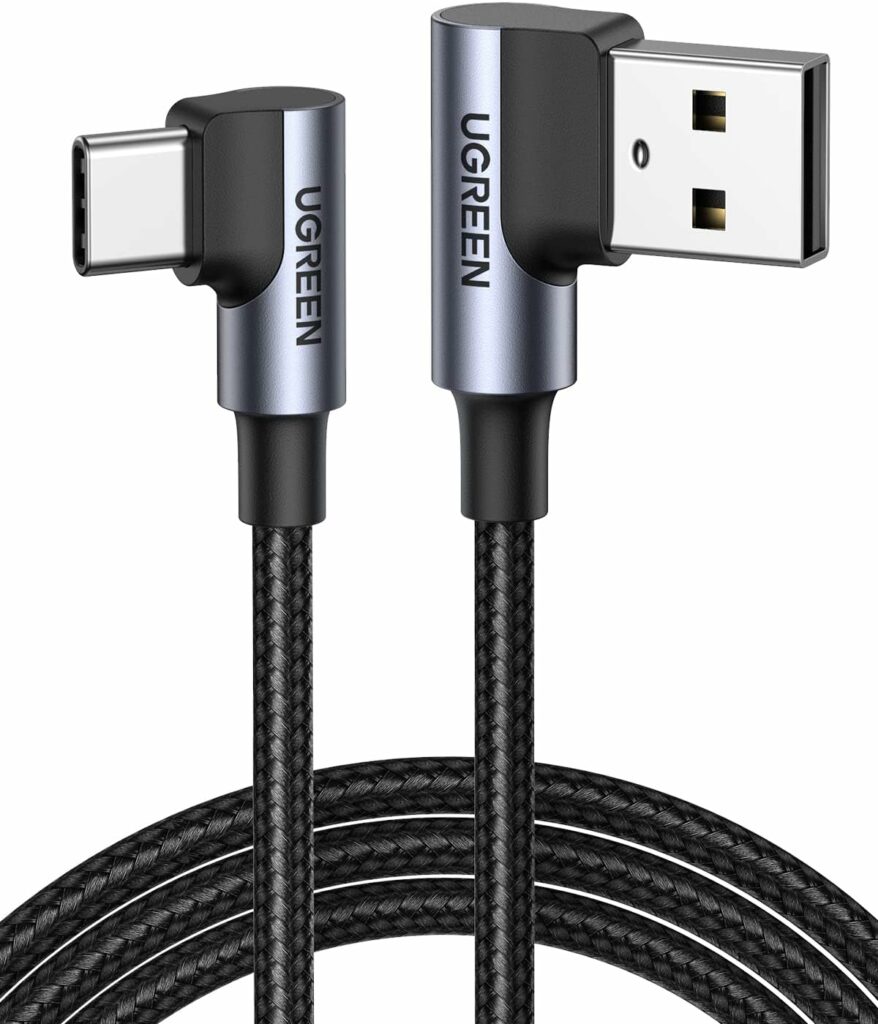
Link: https://www.amazon.de/gp/product/B07PHQGW6P
I connected the enclosure and the antenna to a plexiglass board and mounted both to the balcony.

Link: https://www.amazon.de/gp/product/B0CJHMVTT6
And yes, there is some cleaning needed next spring …
The reception was again fine in this setup, and I received messages. This is also proof that antennas not only work for transmission but also have a receive gain.
My next fear was that the gateway or the UPS could fail when it gets cold in the winter. I am willing to risk it, but I wanted at least to know how cold it gets inside the enclosure.
I decided to use a LoRaWAN sensor inside the box. The gateway is within reach of my WLAN, but with a LoRaWAN sensor, it’s easier to get the data into my Grafana IoT dashboard. I decided to buy two Dragino devices because they have good value for money and can connect an external temperature sensor to measure inside and outside the enclosure.
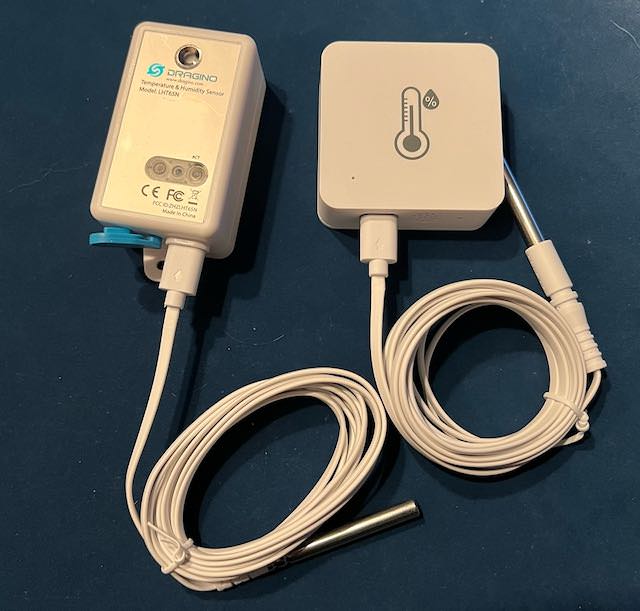
Link1: https://iot-shop.de/en/shop/dg-lht65n-e3-868-dragino-lht65n-e3-lorawan-temperature-humidity-sensor-5595
Link2: https://iot-shop.de/en/shop/dg-lht52-dragino-lht52-temperature-sensor-5427
Link3: https://iot-shop.de/en/shop/dg-as-01-dragino-as-01-external-temperature-probe-for-lht52-5429
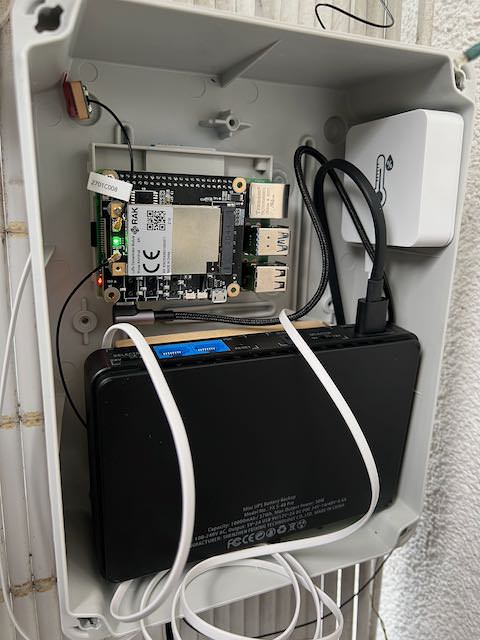
After deciding which one to mount inside the enclosure, I placed the second sensor in the cellar. This is the resulting content of the enclosure:
With that, I finished the hardware setup.
In the next part, I’ll summarize the software setup of this Lab.
The URLs under the pictures only show where I bought the devices. Feel free to look for better vendors.
One Reply to “My LoRaWAN Lab – Part 1, Hardware Setup”