
After looking at the 802.1X and EAP basics in part 1, in this part 2, we go through every packet in a simple EAP-Exchange. Although not used anymore in most situations, this example uses EAP-MD5 because it is easy to understand and perfect for learning how 802.1X and EAP communication works.
These are the components I used in this example:
- The Supplicant device is a WLAPi with Linux
- The Authenticator device is a Meraki MS120 switch
- The Authentication Server (AS) is the Cisco ISE
But any other combination of devices could be used as long as the Supplicant and the Authentication Server support EAP-MD5 and the Authenticator device supports 802.1X.
Packet by Packet
This picture summarizes the communication that we’ll look at:
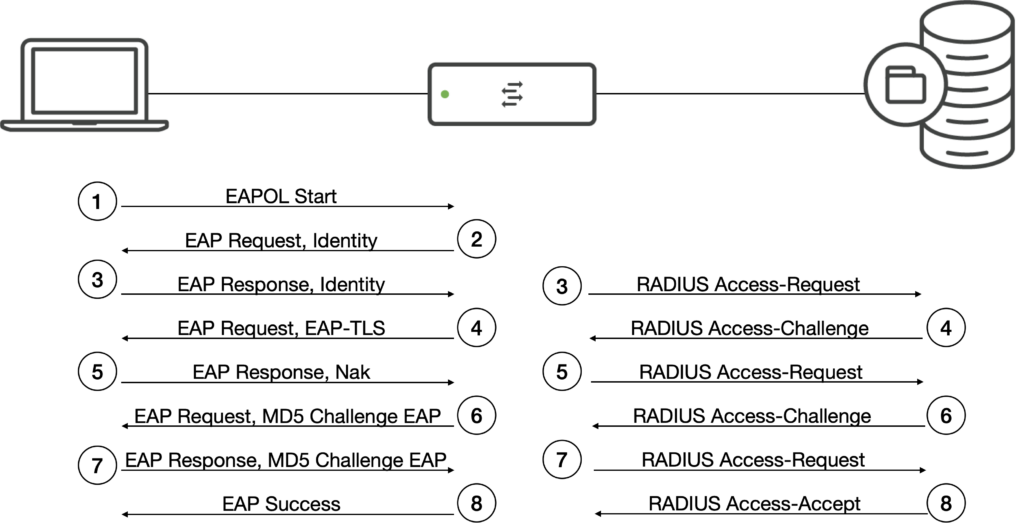
To keep it simple, I use the generic term “packet” instead of “frame” or “datagram” in this example.
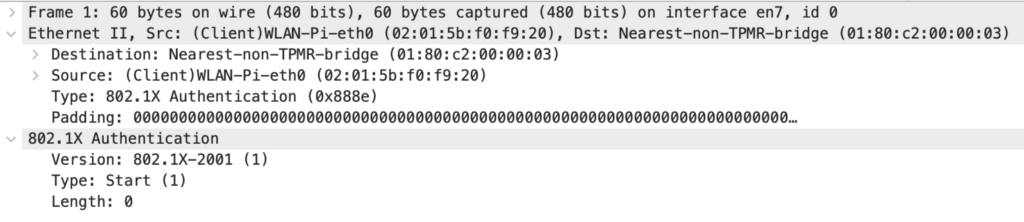
Packet 1: Supplicant to Authenticator
The Client starts with an “EAPOL Start” message to trigger the authentication. This packet is not mandatory, it could be missing, and the Authenticator could start the communication. The Linux supplicant uses the 802.1X version 2001, the first published standard. This and all the following frames between the Supplicant and the Authenticator is an L2 communication. The available 802.1X Types are defined in the IEEE 802.1X standard.
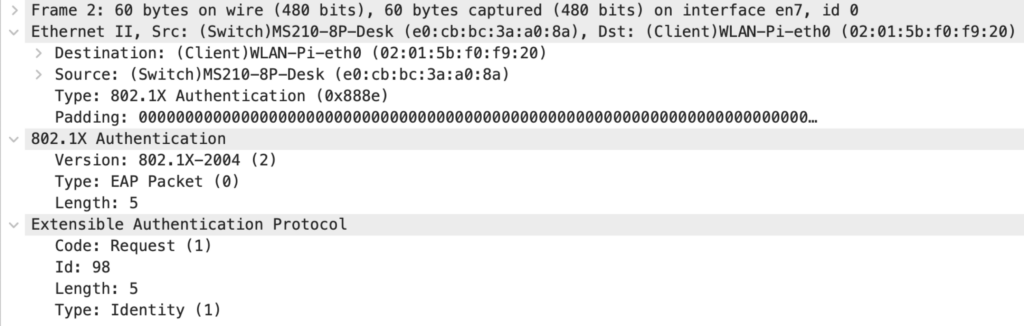
Packet 2: Authenticator to Supplicant
The Authenticator either answers the “EAPOL Start” with an “EAP Request, Identity” or initiates the communication with this identity request. The Meraki switch uses 802.1X version 2004, which doesn’t have to match the Supplicants version. Inside 802.1X, EAP is transported. The Id is used to map a request to the following response. The EAP codes and types are defined in the EAP RFC.
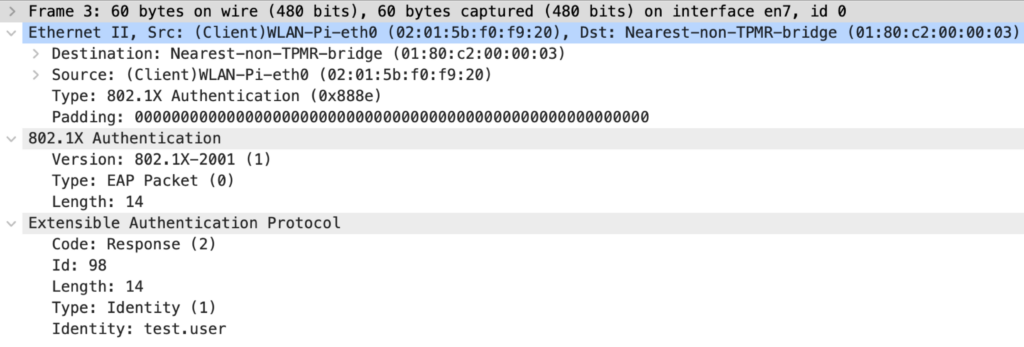
Packet 3: Supplicant to Authenticator
The Supplicant responds to the Identity request with its identity. In tunneled implementations of EAP, we would typically see a dummy identity like “anonymous”, and the real identity is only sent through the (TLS) tunnel. This packet and the following ones are used to negotiate the EAP method between the Supplicant and the Authentication Server. We also see that the response Id matches the request Id in the previous packet.
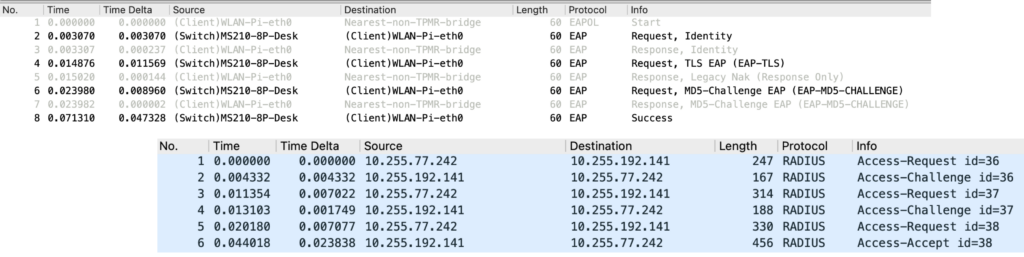
Packet 3: Authenticator to Authentication Server
The EAP response needs to be forwarded to the authentication server. This is done inside a RADIUS Access-Request. The RADIUS details are not part of this blog post; many of the Attribute-Value-Pairs (AVP) are defined in the RADIUS RFC:
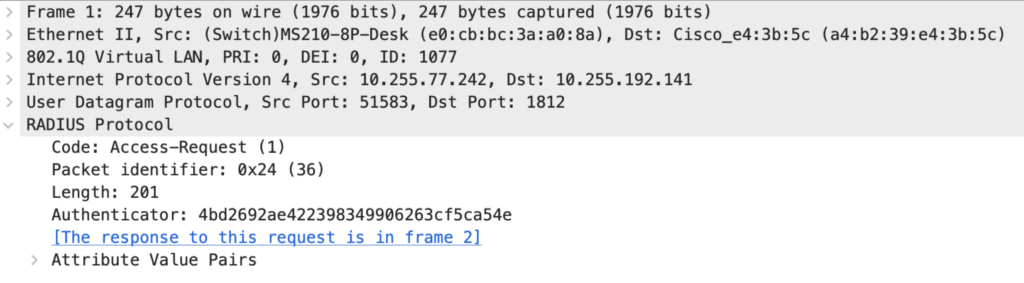
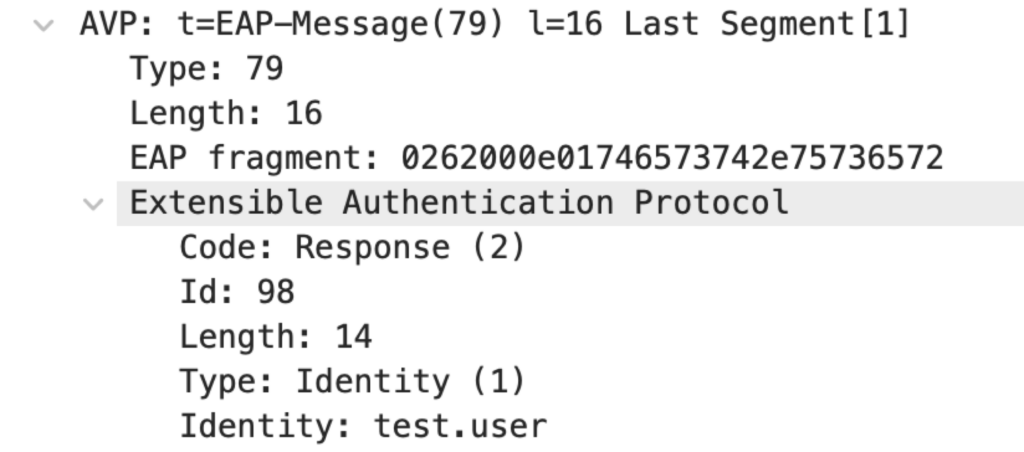
The most relevant RADIUS AVP for this post is EAP-Message. This is the same EAP packet that we see between the Supplicant and Authenticator. But this time, it is encapsulated in IP, UDP, and RADIUS instead of EAPOL.
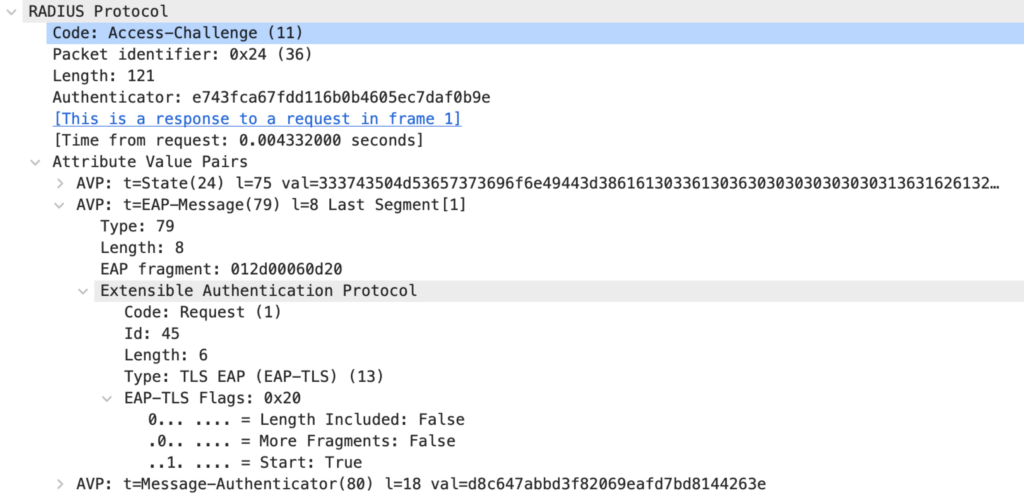
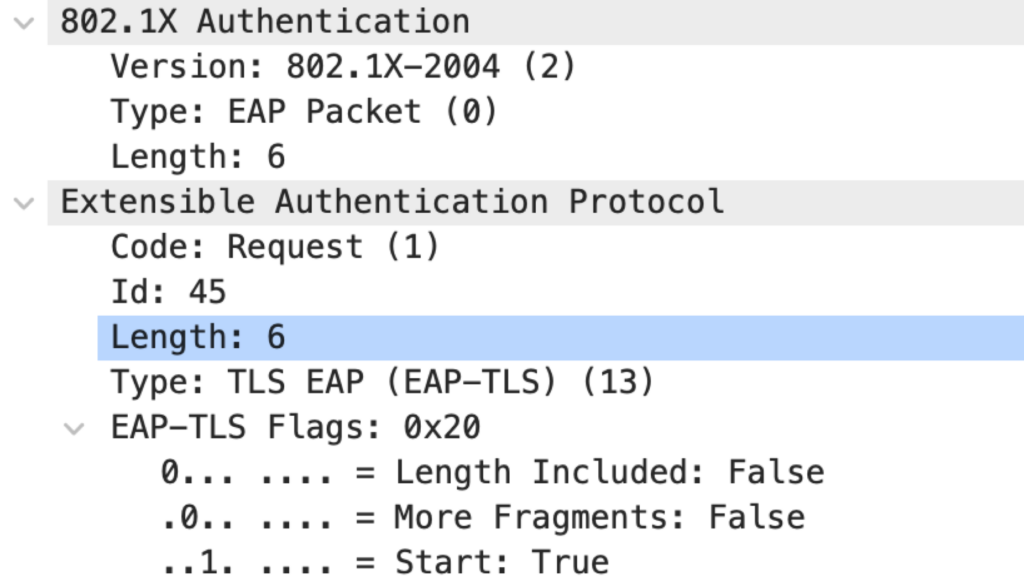
Packet 4: Authentication Server to Authenticator
When the first EAP Identity response reaches the Authentication Server, there is no knowledge of which EAP method the Supplicant wants to use. In this example, the AS sends an EAP Request of Type EAP-TLS. This is because my Cisco ISE is configured to prefer this EAP method. Until the final Access-Accept or Access-Reject can be sent, all packets from the AS to the Authenticator are RADIUS Access-Challenge packets.
Packet 4: Authenticator to Supplicant
The same EAP packet is forwarded to the supplicant.
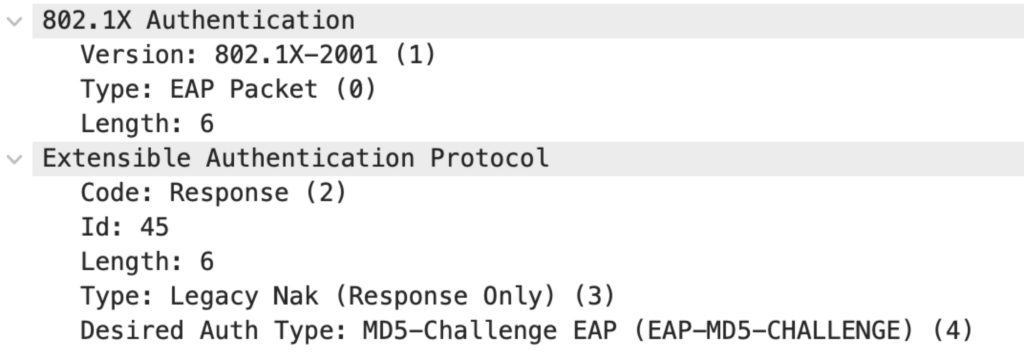
Packet 5: Supplicant to Authenticator
The Supplicant is only configured for EAP-MD5. It refuses the AS-preferred method EAP-TLS and sends a hint for the configured EAP-Method.
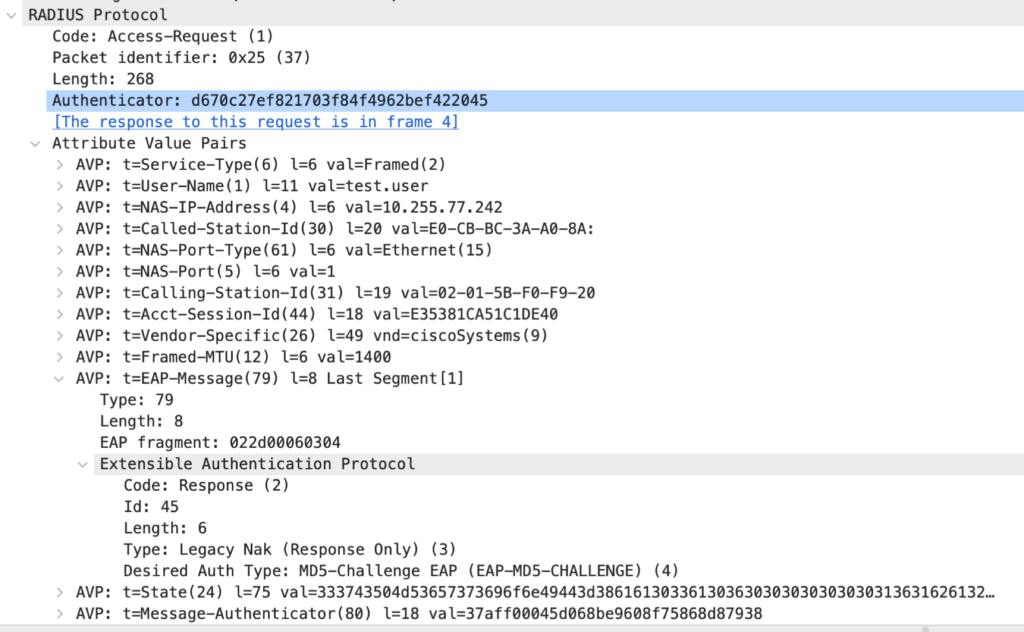
Packet 5: Authenticator to Authentication Server
The EAP response is forwarded to the Authentication Server inside of a RADIUS Access-Request message.
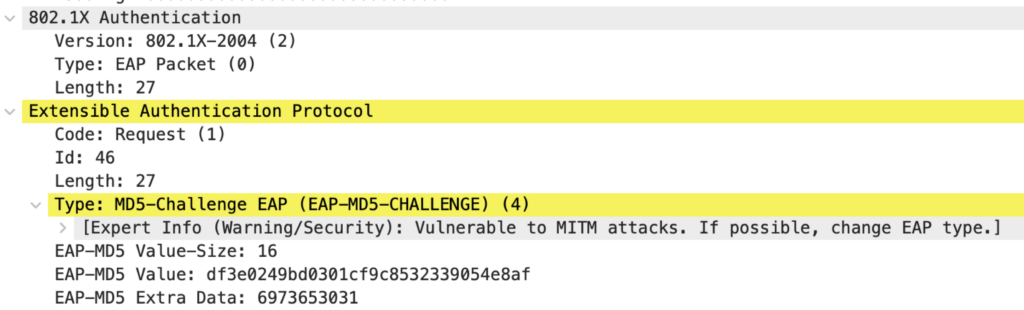
Packet 6: Authentication Server to Authenticator
A “real world” Authentication Server would answer with a “Failure” EAP message inside an Access-Reject because EAP-MD5 is not usually enabled. In this example, the AS sends a new EAP Request with an MD5 Challenge.

Packet 6: Authenticator to Supplicant
Again, the EAP packet is forwarded with EAPOL.
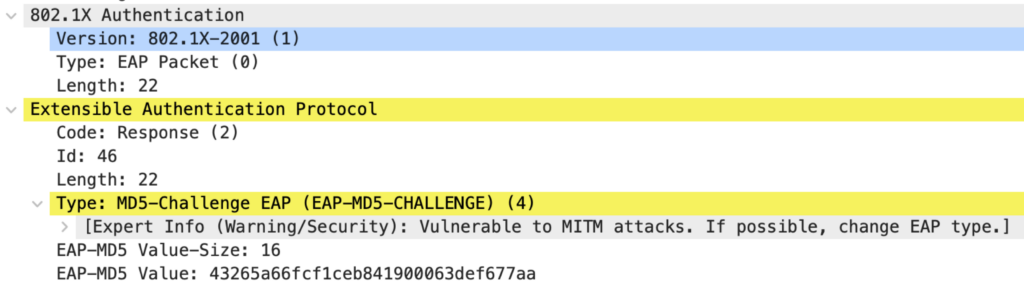
Packet 7: Supplicant to Authenticator
The Supplicant calculates an EAP-MD5 value to prove its identity. This calculation is similar to what is done with PPP CHAP. The resulting value is sent in an EAP response.
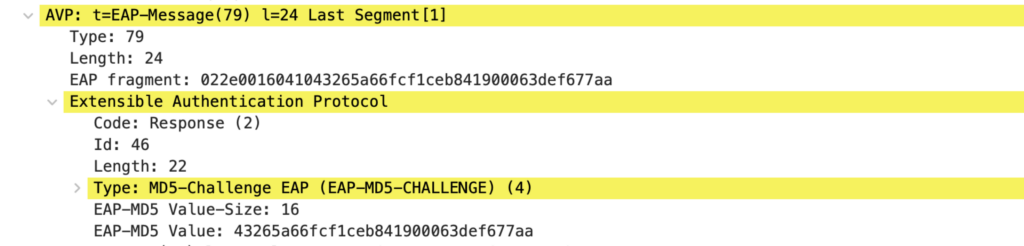
Packet 7: Authenticator to Authentication Server
As before, the EAP response is forwarded to the AS.
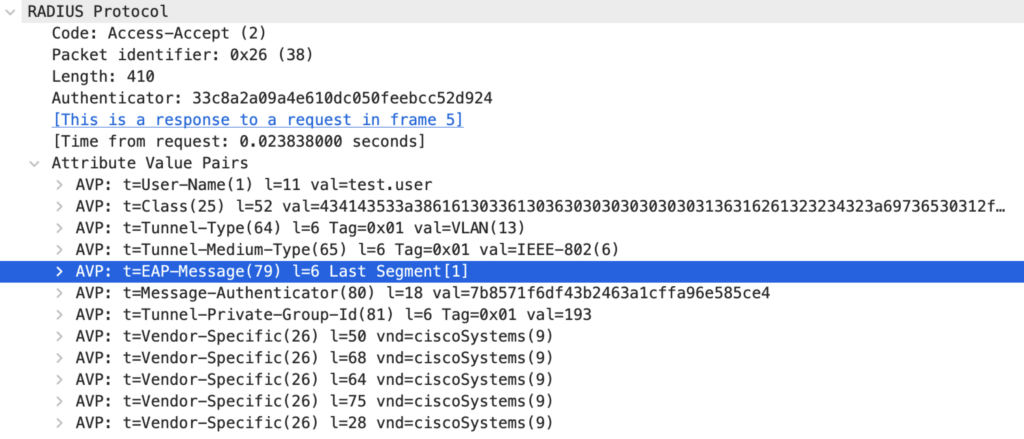
Packet 8: Authentication Server to Authenticator
The Authentication Server can confirm the client’s identity based on the provided username and MD5-hash. The Authenticator is informed of the success with a RADIUS Access-Accept message. Based on this message, the Authenticator opens the Controlled Port for communication. The EAP-Message AVP includes a Success code.
Packet 8: Authenticator to Supplicant
The EAP Success is forwarded to inform the Supplicant that the authentication worked as expected.
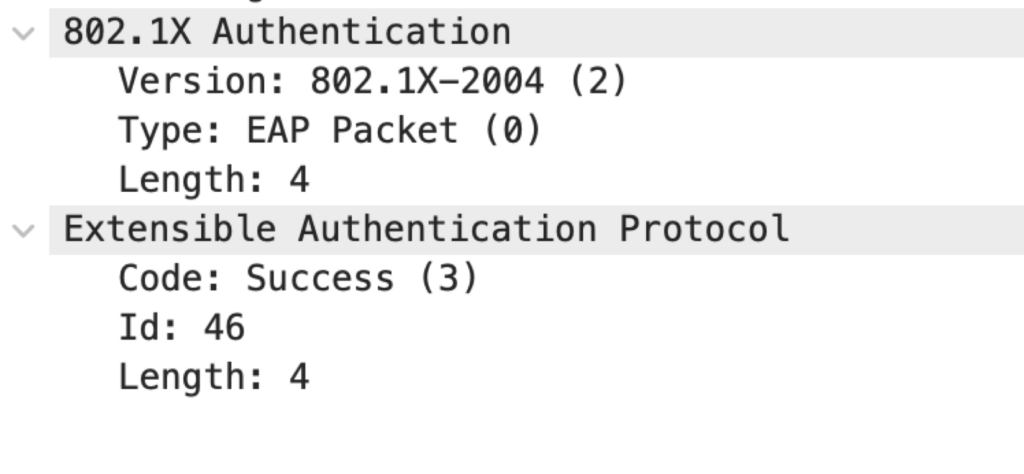
With this packet, the 802.1X/EAP exchange has finished. On the RADIUS side, we will likely see some following Accounting messages, but these are not relevant for 802.1X and EAP.
The better Packet 6: Authentication Server to Authenticator
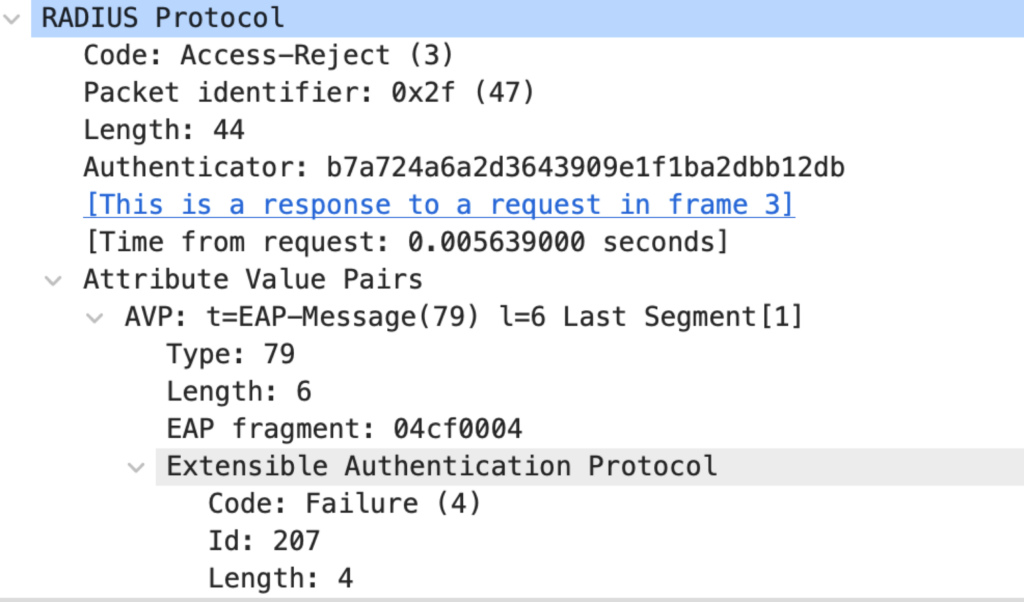
In at least 99% of all “real-world” implementations, we would not want our Authentication Server to accept an insecure EAP method like EAP-MD5 (same for protocols like LEAP). So, for this response, I disabled these Methods on the Authentication Server.
Next is the typical response to the Supplicant’s request to use EAP-MD5. The AS sends a RADIUS Access-Reject to the Authenticator; the included EAP-Message AVP stated a Failure to inform the Supplicant that the previous request could not be fulfilled.
One Reply to “IEEE 802.1X and EAP – Part 2: Packet by Packet”