

There are many guides on the internet for the setup of the Cisco Catalyst 9800-CL. But most of them are pretty old, and things have changed in the meantime. This guide is based on version 17.15.3 of the 9800-CL.
It shows how to do the basic setup on VMware ESXi in three steps. This is certainly not the only way to set it up, just the way I prefer it:
- Installing the VM
- Adding the minimum needed config on the VMware console
- Finishing the setup remotely
Installing the VM
First you have to download the install medium from software.cisco.com. I prefer the “ova”-file:

Deploy it on your ESX server. This guide is using a standalone ESXi, not the VCenter.
For a lab setup, these are my deployment options:
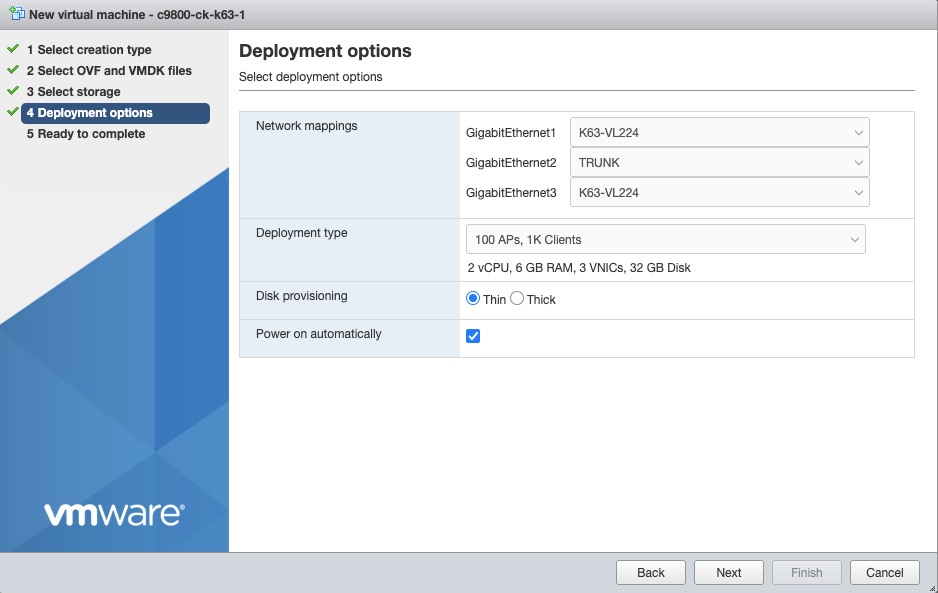
GigabitEthernet1 is for OOB management, GigabitEthernet3 is for HA. For a lab setup, I’ll disable them later.
GigabitEthernet2 is our primary interface for AP and Client communication. It’s a VMware interface that uses tagged frames:
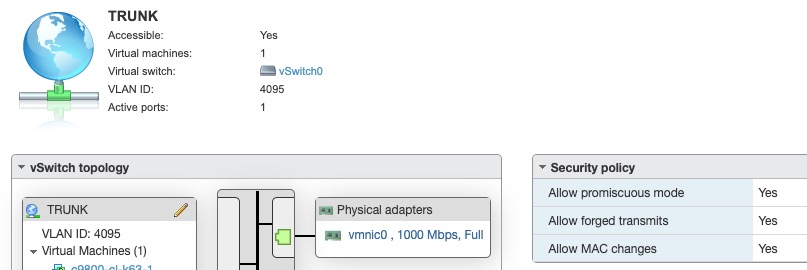
The important settings are:
- VLAN ID 4095 to make it a Trunk
- Allow promiscuous mode = Yes
- Allow Forged transmits = Yes
Minimum needed config on the VMware console
This part is meant to make the VM accessible through SSH, as the configuration is much more comfortable through SSH than through the VMware console:
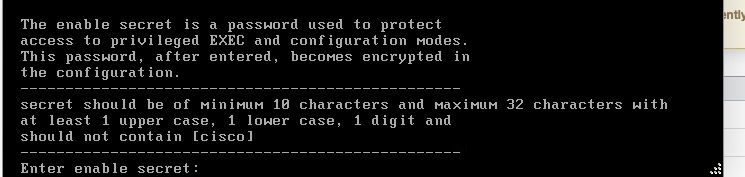
Say no to the initial configuration dialog:

Enter your preferred secret:
Next we go to the IOS command prompt.
Adding a temporary user to access the VM by SSH. I use a temporary user and password because my real admin user has a password that is much longer and more complex. The likelihood of typos is much higher in the VMware console compared to SSH:
conf t
username temp priv 15 secret temp
aaa new-model
aaa authentication login default local
aaa authorization exec default local
Configure the IP-Settings of my management interface:
vlan 1224
 name WLC-Mgmt
!
interface Vlan1224
 ip address 10.255.224.200 255.255.255.0
!
default interface vlan 1
!
ip route 0.0.0.0 0.0.0.0 10.255.224.254
!
interface GigabitEthernet2
 switchport trunk native vlan 1239
 switchport mode trunk
Your settings might vary. With this basic config, we can continue on SSH.
Finishing the setup remotely
➜ ~ ssh -l temp 10.255.224.200First I configure my “real” admin user and delete the temp user:
conf t
username admin privilege 15 algorithm-type scrypt secret YOUR-NEW-PASSWORD
!
no username temp
Next, I add the host-settings:
hostname c9800-cl-k63-1
ip domain name wireless-training.net
ip name-server 10.255.224.101 10.255.192.101
!
clock timezone CET 1 0
clock summer-time CEST recurring last Sun Mar 2:00 last Sun Oct 3:00
!
ntp server ptbtime2.ptb.de
ntp server ptbtime1.ptb.de
!
ip access-list standard restrict_ipv4_webui
 10 permit 10.255.0.0 0.0.255.255
!
no ip http server
ip http access-class ipv4 restrict_ipv4_webui
ip http authentication aaa login-authentication default
ip http authentication aaa exec-authorization default
ip http secure-server
no ip http client source-interface Vlan1
!
interface GigabitEthernet1
 shutdown
!
interface GigabitEthernet3
 shutdown
Again, adjust this to your needs.
Next we need a trustpoint which is used for the DTLS-communication:
! This is done in Privilege mode:
wireless config vwlc-ssc key-size 4096 signature-algo sha384 password 0 YOUR-PASSWORD
The wireless management interface and the wireless country gets defined:
conf t
wireless management interface vlan 1224
!
wireless country DE
As a last step, don’t forget to save the config, or the GUI won’t get out of the day0-loop:
wrNow the 9800-CL can be accessed through the GUI.
Some additional config that I always need (regardless of LAB or production), and what I always configure through the CLI:
radius server ISE-1
 address ipv4 ISE-IP-1 auth-port 1812 acct-port 1813
 key 0 YOUR-RADIUS-SECRET
!
aaa server radius dynamic-author
 client ISE-IP-1
 server-key 0 YOUR-RADIUS-SECRET
!
aaa group server radius ISE-ALL
 server name ISE-1
!
aaa authentication dot1x ISE-AuthC group ISE-ALL
aaa authorization network ISE-AuthZ group ISE-ALL
aaa accounting identity default start-stop group ISE-ALL
!
service tcp-keepalives-in
service tcp-keepalives-out
!
line vty 0 50
 transport input ssh
Have fun with your Cisco Catalyst 9800-CL!
– It’s also advisable to increase the VTY count to 50 with the command ‘line vty 0 50’
To prevent WebUI issues while using some large GUI options (VLANs for example)
Also use service tcp-keepalives-in
service tcp-keepalives-out
to recycle orphaned tcp connections
Oh, yes, this is a good one! I have this on production systems, but totally forgot it when thinking about a Lab-setup while writing this blog post.